Ok, as newb myself who knows nothing of coding or tilesets, I’d making a tileset for a mod was tedious in the least. Since most info regarding it is old and disjointed among threads with advanced knowledge, and checking recent related topics leads to unanswered questions, it took me a bit of time to get to making a functional one.
So heres some basic stuff I learned by looking at pre-existing mods, for any future newbs interested in making a tileset. It may not be efficient if any senior here deems it, but it worked.
I’m sure anyone dedicated can figure out themselves through trial and error, this ight quicken the process.
-
You dont need Chase’s Tileset editor. It wont help you make a new tileset, and making a smaller tileset with it somehow seems impossible as it doesnt seem to open them. Atleast it didnt for me. I just used Paint.net. Dont confuse it with simple paint. Look it up, its free unlike aesprite. There’s also Piskel, though i havent tried using it.
-
Always name the tileset JSON file as tile_config.json or mod_tileset.json. Always put the tileset PNG and Json in the same file and name it mod_tileset.
-
Now the Coding aspect.
A mod_tileset.json allows you to add sprites for any mods you are adding to pre-existing tilesets, without messing with the originals. Its written like this:
[
{
“type”: “mod_tileset”,
“compatibility”: [
“Chibi_Ultica”,
“UltimateCataclysm”
],
“tile_info”: [
{
“pixelscale”: 1,
“width”: 32,
“height”: 32,
“zlevel_height”: 0,
“iso”: false,
“retract_dist_min”: -1.0,
“retract_dist_max”: 1.0
}
],
“tiles-new”: [
{
“file”: “mod_tileset/Eldritch_BioArmor_normal.png”,
“//”: “range 0 to 12”,
“sprite_width”: 36,
“sprite_height”: 38,
“sprite_offset_x”: -2,
“sprite_offset_y”: -10,
“tiles”: [
{ “id”: “overlay_female_mutation_ELDRITCH_EXTRA_CLAWS”, “fg”: 0 },
{ “id”: “overlay_male_mutation_ELDRITCH_EXTRA_CLAWS”, “fg”: 1 },
{ “id”: “overlay_female_mutation_ELDRITCH_MAW”, “fg”: 4 },
And so on. The start and the tile_info is must. After that in the “tiles-new”, write folder name(mod_tileset)/ then the PNG name in the file.
-
After file is “//”, which something like a description. It counts the ‘Sprites’ you have set in the PNG, we’ll get to that in a sec. Always start from 0, otherwise you’ll skip the first image.
-
Usually the tileset PNG is a Sprite sheet containing many small images. These are individual sprites. You set how many pixels a Sprite takes in the PNG along x and y axis. As soon as a sprite ends on one side, another starts. There’s no gaps. For example, the sprite_width is 36, so after 36 pixels another Sprite will exist. This is how you separate different images as sprites. By spacing them accordingly. Also, the sheet is read from Left to Right, then the Row below.
-
The sprite_offset are very helpful. Once your tileset works and you can see the sprite in game, assigned to the proper id; you might find your sprites off centre. like the eyes mutations sprites are outside the character head, etc.
Use these to recentre them. This will apply to the whole tileset. How is the problem caused? when making the tileset, they were off centre. So if only or 2 sprites are off centre, you will have to edit the PNG instead. -
After these are the “tiles”, where you add the id of the sprite and add its id number (basicaly).
I only did mutations so I cant help in clothes or items, but in the id, the “overlay_female_mutation_ELDRITCH_EXTRA_CLAWS” shows that overlays for the sprite will have male and female versions, the mutation_ allows you to write the mutation you want the sprite to be linked to. You have to write exact mutation id. for example CHITIN3 for Chitin Platemail.
The “fg” is the Foreground, the actual sprite itself that will move with the character and turn left or right too. The number after that is the sprite number. Meaning fg: 0 means the very first sprite is used (as it starts on the 0TH pixel, atleast in Paint.net).
There also exists “bg”, for Background. You can set a sprite as a constant background to a foreground sprite. But it doesnt move or rotate.
So a Asymmetrical sprite will stay the exact same. The sprite wont turn and will look awkward. So ive only seen this used for circular shadows under characters.
Then end the jSON file like the ususal. Be careful of Brackets/Parentheses and Commas. They stop world creation entirely if written wrong.
-
Now the Tileset Making Part:
This is the Trickiest and most tedious part.
This is a barbaric way but with counting and numbers, you are warned. -
Copy the tileset (PNG) you wanna make sprites from into a separate folder and open it with Paint.net. You will possibly be editing the tileset, so do this so that you dont accidentally save the original tileset that is in_game. Otherwise youll have extra work cleaning the origianl too.
Lets take for example, the human_body.png from Ultica for skin muations.

As you can see, its alot. Identify which one you want to use and keep in mind for now.
-
Since the set Sprite width and height are 32 and 36 respectively, starting and including zeroth pixels, after every 32 pixels horizontally and 36 pixels vertically is another sprite.
Using this identify the border pixels for the sprite you wanna frustatedly rip out. Since paint.net tells you the number of the pixel you hover, its not impossible.
using a calculator to identify which pixel columns or rows are boundaries becomes easier.
Mark these points with a pencil. Do it above, below and left right of the sprite.
You will have to be careful, the very first values will be 31 and 35 cuz again, the 0TH pixel columns and rows are counted as the first pixel. Then keep adding 32 horizontally or 36 vertically after that. -
Tip: Count from the side the sprite is closest to.
-
So you’ve isolated your sprite(s), now make a new file with paint. The height and width will depend on the sprite sizes you are choosing.
For example, if you’re carrying over the 32 by 36 (x,y axis) of Ultica’s human_body.png, keep the width and height a multiple of 32 and 36 respectively.
For example, 96 (332) by 180 (536) will give you 3 columns and 5 rows for exactly 15 sprites. -
Add a transparent layer from the Layer Tab and delete the Background layer, giving you the perfect PNG background.
-
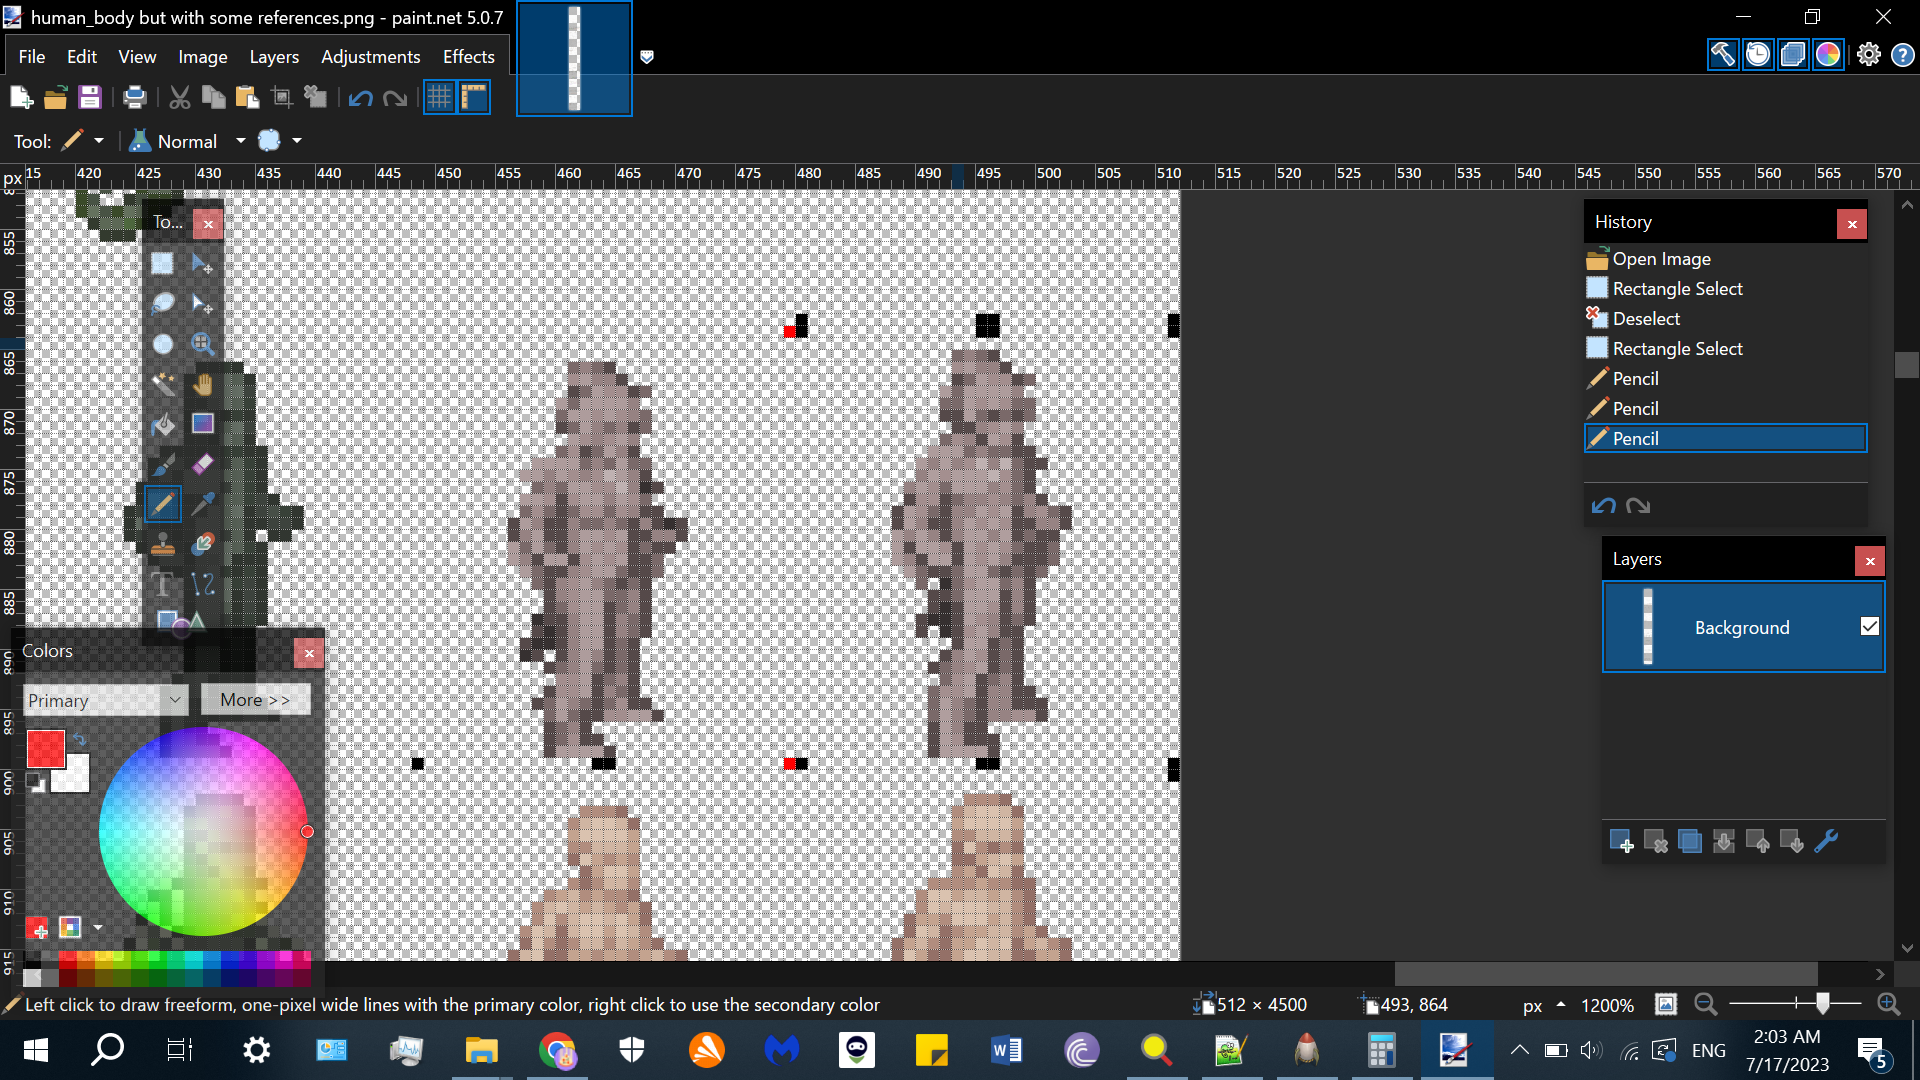
Now your ‘isolation’ of the sprite should be similar to this way. Red dots belong to the previous sprite. Only the black dots mark the true borders. In other words, the dots are inside the sprite but at its edges and corners.
-
Use 'rectangle select" and copy the entire sprite and paste it in the new image in the top left corner with no gaps. Keep adding the sprites you want to the right of the previous sprite and then start at the leftmost edge of the row below. Careful not to overlap the sprites.
-
Now use the options in Paint.net to edit the sprites as necessary. You wont have a problem as long as the edits are within the sprite’s boundaries and the sprite isn’t off center.
For example, the center in the last image was the pixel column passing through the front part of the lower foot of the sprite. -
If you’re having trouble seeing white sprites, add another layer below the current one. select only it and fill its entirety with the black colour.
-
Now we’re almost done. In the case that your editing goes outside the sprite boundaries, you have to modify its boundaries (width and height) and make a new image of those lengths. You can make another sprite sheet just for it, of copy/paste and edit the entirety of the original sheet and modify it to the new dimensions of sprites. For example, 36 by 38 instead of 32 by 36.
Remember to specify the new dimensions in the JSON. -
Layering:
In the game’s JSON/mutations is the mutation_ordering file. Why do we need it?
Cuz your new sprites arent ordered in their layering. This can cause the eyes or armor to be hidden underneath the skin or the wings be covering arms. So copy the the Json, add the ids of your sprites (mutations in this case) in respective layers and remove excess ids. Then save in the mod folder.
That should be it. As you can see, this has info about the basics but touches mutation sprites too. That’s cuz mutations are the only things I’ve tried modding so far.
But the process should relatively be same for other items. Monsters shouldn’t need layering, unless they somehow have layers and I’m ignorant
Most likely, wieldables will have layers.
This is the end of all I’ve learned, Hopefully it helps.
To the newbs being Horrified of this text wall, don’t be afraid its doable and interesting once you get the feel of the tools.
I’ve simplified the best I can, but you will need basic info on using JSON. That’s also relatively easy.
My final suggestion is to look at the pre-existing mods and their tilesets, cuz they are somewhat simplified and easier to grasp. Once you get a grasp of how they work, its becomes quite easy.
So Goodluck any Fellow Noobs out there.